
How do you test a UTP cable without making mistakes?
- , by Jarno Heideman
- 6 min reading time

How to test a utp cable without making mistakes
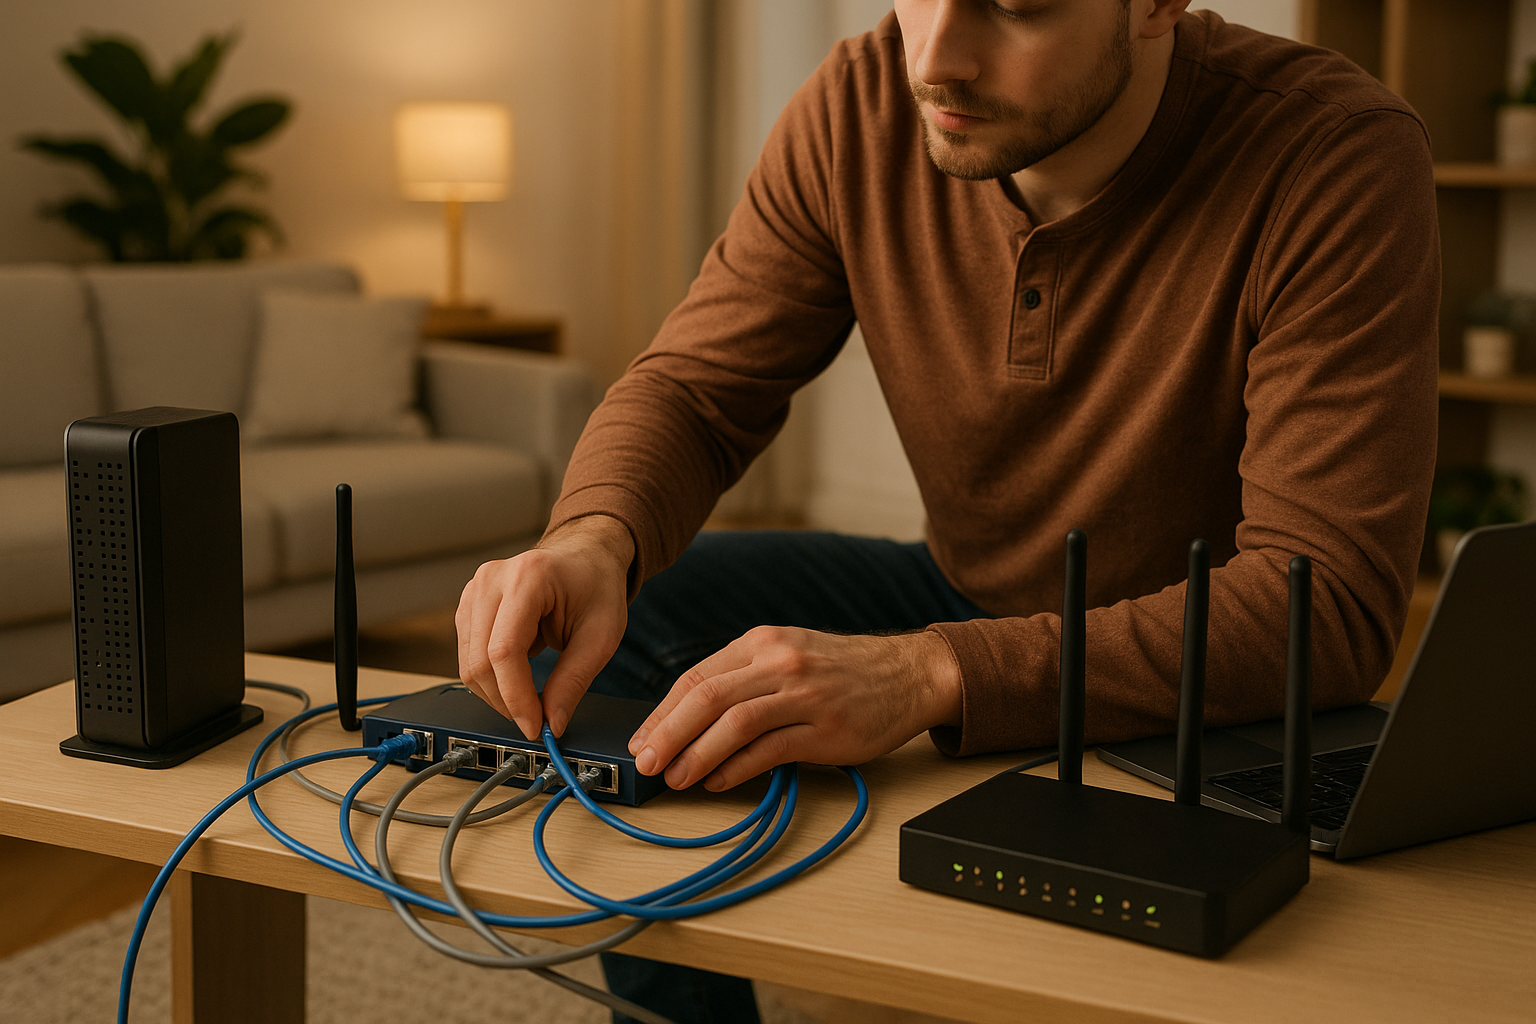
Bad wifi or a stuttering network often starts with the cables. A utp cable may seem harmless, but a small error in the connection or a break in the wire can be enough to disrupt your connection. In this manual you can read how you can easily check whether a cable is working properly and how you can prevent problems.
What a UTP cable does in your network
A utp cable is the standard cable for networks at home or in the office. Utp stands for unshielded twisted pair, a type of cable with four pairs of copper wire, each with its own color code. These pairs are twisted together to limit interference. The cable provides the physical connection between devices such as your router, switch, computer or printer. The ends are equipped with an RJ45 plug.
Why checking your cable is smart
A network only works properly if all components are in order. A damaged or incorrectly connected cable will cause slow internet, lost connections or no signal. Especially if you make custom cables yourself, testing is a logical step. A check is also advisable when reusing old cables or after a move.
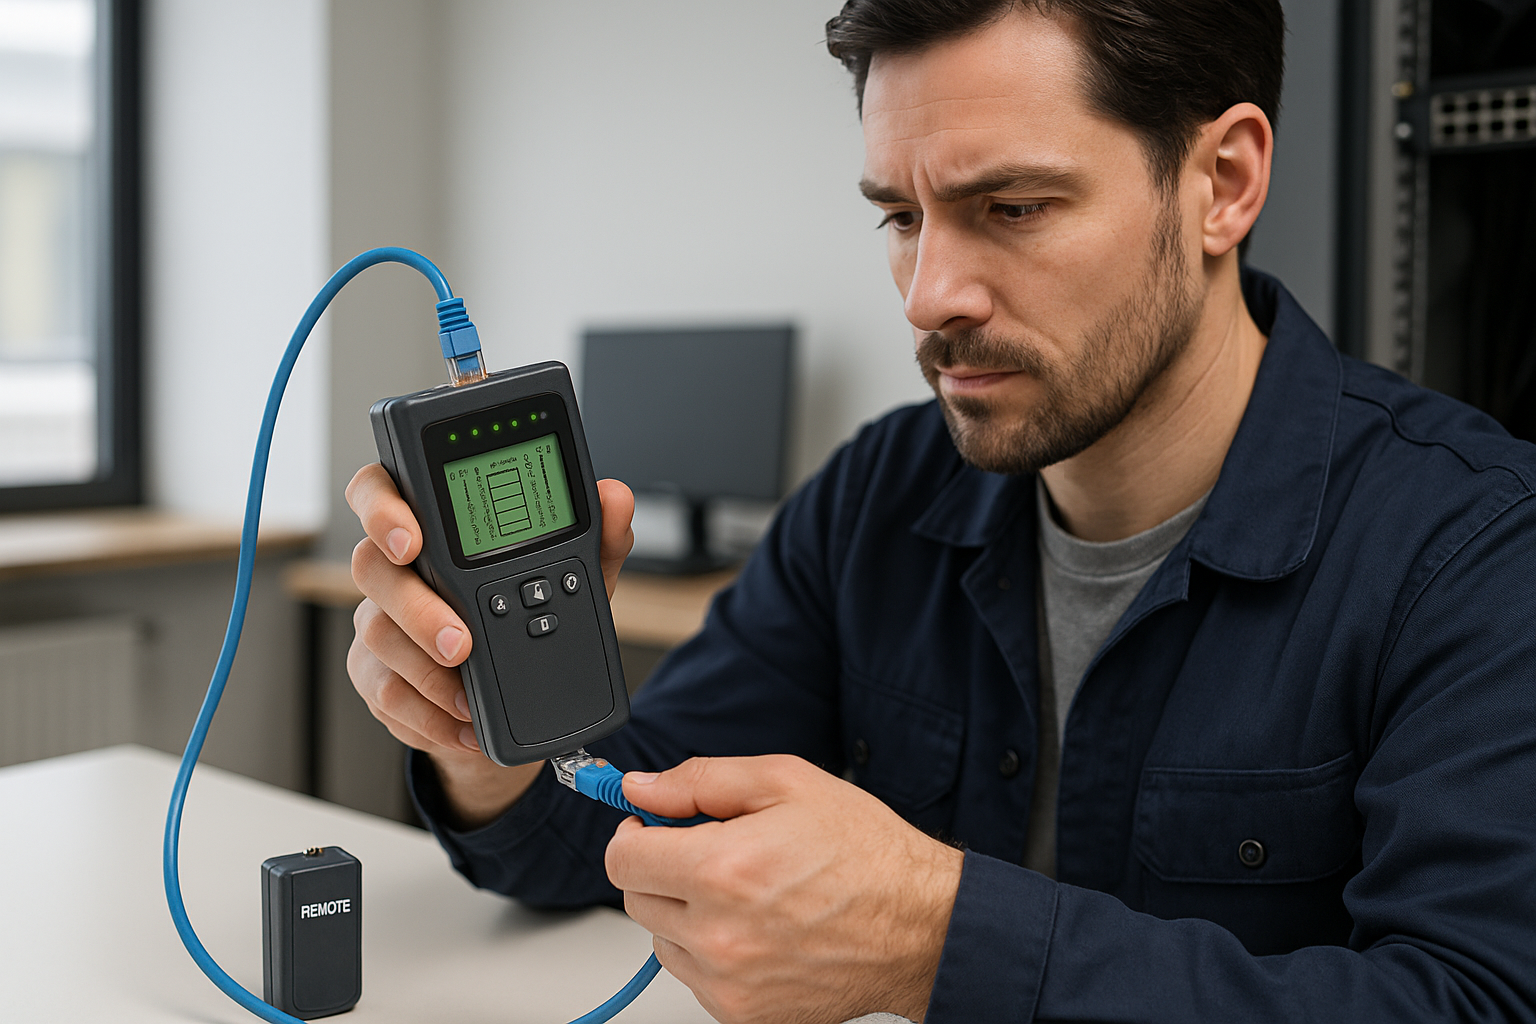
What you need to properly test a UTP cable
For a simple test, there are a few handy tools you can get:
-
A cable tester that shows whether all wires are properly connected
-
A pair of cutting pliers and a crimping pliers for making or repairing cables
-
Possibly a multimeter if you want to test a bit more deeply
Most standard testers indicate with lights or a screen whether the connections are correct. For professional use there are testers that can also measure interference, length and signal loss.
How to check a cable step by step
Testing a UTP cable takes a few simple steps:
-
Insert both ends of the cable into the tester
-
Turn on the device and wait for the signal to travel through the veins
-
Check that all numbers from 1 to 8 appear in the correct order
-
Look for any abnormalities such as flashing lights or missing numbers
-
Repeat the test if the result is unclear or incorrect
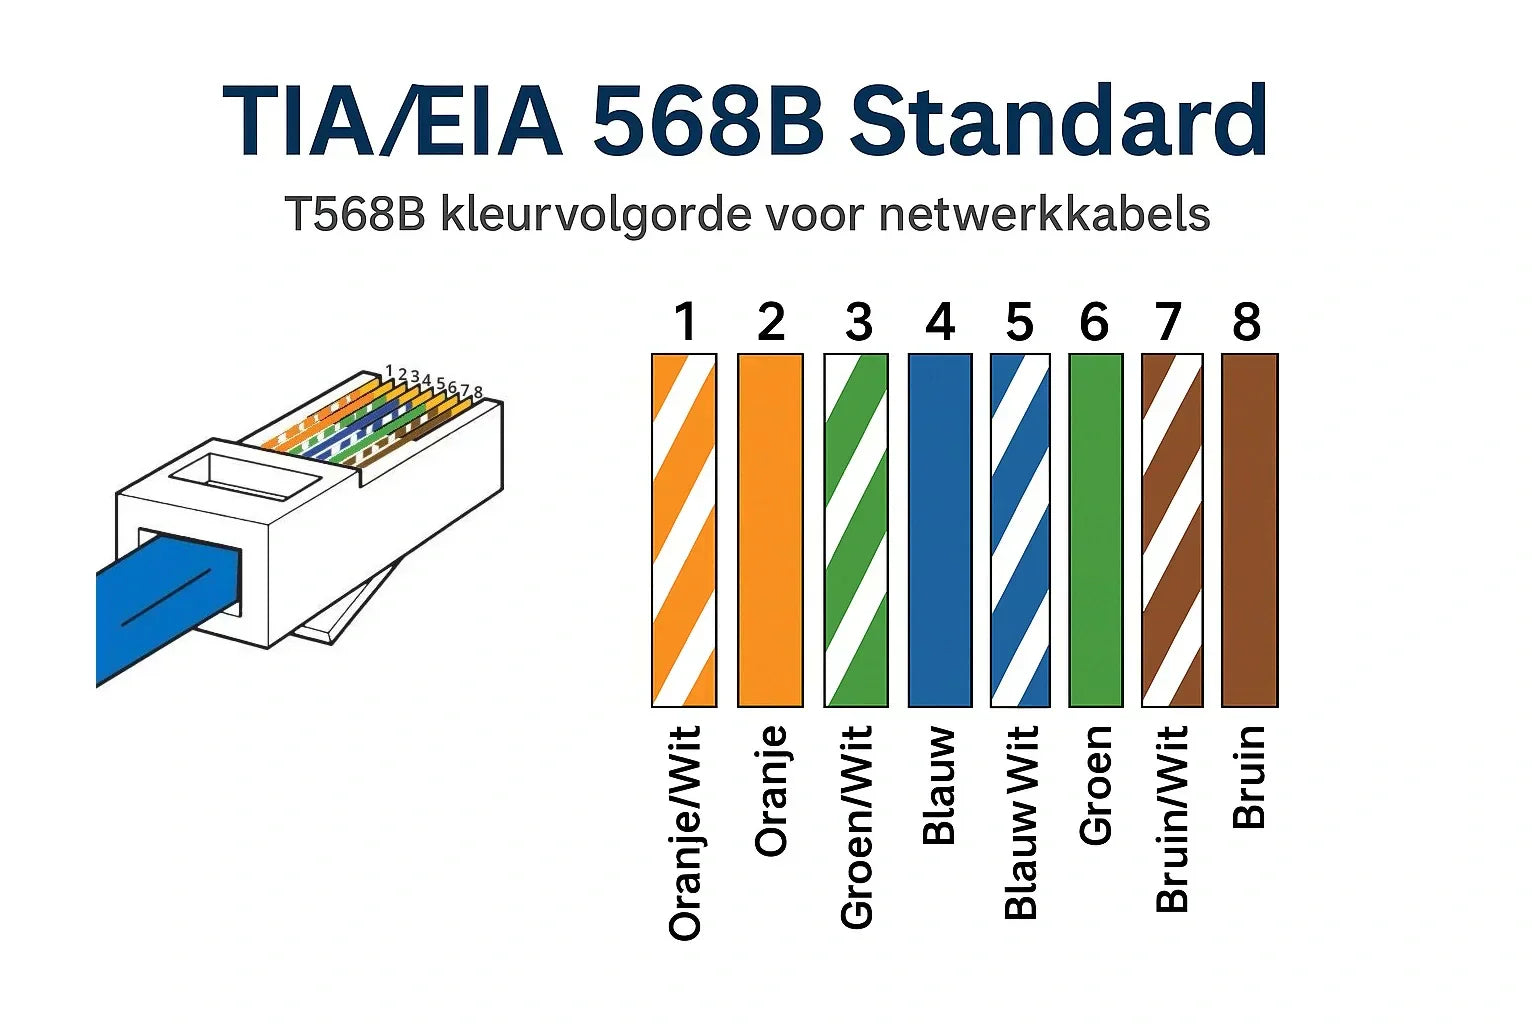
In a straight cable, the numbers on both sides must be the same. In a cross-over cable, some cores are swapped, which is also visible in the test.
Common Mistakes When Testing Cables
There are a number of mistakes that are often made when installing or testing network cables:
-
Veins connected in the wrong order
-
A vein not properly secured in the connector
-
The plug is not properly crimped
-
Damage due to excessive pulling or bending
A cable tester will quickly show you if something is wrong, but it also helps to visually check if the colors are in the right place according to the standard order.
Which testers are suitable for your situation
There are different types of testers available, from simple models to extensive measuring equipment. For home use, a basic tester is often sufficient. It checks whether the cable works and whether all cores are properly connected.
For larger networks or professional use, there are more advanced testers. They also measure the length of the cable or signal where a break is. These types of devices are useful for installers or IT professionals who work with network cabling on a daily basis.
When choosing a tester, look for these features:
-
Support for RJ45 connectors
-
Clear display of test results
-
Ease of use and portability
How to make sure your measurement is correct
Do you doubt the reliability of your measurement? Then pay attention to the following:
-
Use a cable that you know works well for comparison
-
Test the same cable multiple times to see if the result is consistent
-
Check that the connectors are properly secured and do not contain any loose wires
-
Make sure your tester's batteries are full
By following these steps you can ensure that the cable you use does not cause interference.
Practical example
A customer had custom-made cables for his home network. The connection worked, but was slow and sometimes dropped. After testing, it turned out that two cores had been swapped. By following the correct order according to the 568B standard, everything worked smoothly afterwards.
For simple cables use a continuity tester. For commercial installations certification is required.
Color codes for correct connection
The most commonly used sequence for network cables is the 568B standard:
-
Orange and white
-
Orange
-
Green-white
-
Blue
-
Blue-white
-
Green
-
Brown-white
-
Brown
Make sure both ends are connected in exactly the same way for a stable connection.
Checklist for good preparation
-
Use a neat cable without kinks or damage
-
Cut the wires straight and slide them to the end of the plug
-
Follow a fixed color code such as 568A or 568B
-
Use a reliable crimping tool and check for play
-
Always test the cable before using it
Ready to test your cables
A network that works well starts with reliable cabling. By checking your cables properly, you prevent malfunctions and frustration. With the right tools and knowledge, you are only a few steps away from a stable connection.
View the range of cable testers on netwerkkabel.eu and choose the tester that suits your situation.
Gerelateerde categorieën
Bekijk onze andere blogs
-
, by Jarno Heideman How do you easily set up a home network yourself?
-
, by Jarno Heideman What are the color codes of UTP cables and how do you use them correctly?
-
, by Jarno Heideman How do you test a UTP cable without making mistakes?
-
, by Jarno Heideman How do you connect fiber optic yourself without any hassle at home?


