Patch Panels
A network in which everything is neatly and clearly connected not only works better but also prevents a lot of frustration. With a patch panel you bring structure to your cabling and make maintenance and expansion easier. Both at home and in a professional work environment this is a smart choice.
Here you can read everything you need to know to choose the right patch panel and connect it correctly.
What a patch panel is and why it is useful
A patch panel is a central connection point where network cables come together. At the back, you connect the fixed cables that come from your home or office. At the front, you connect them with short patch cables to your switch or router. This creates a clear division of your network.
These panels ensure that your cabling remains logical and clear. Problems are found more quickly and adjustments are easier to implement.
Benefits of working with a patch panel
A patch panel helps you keep your network organized and adaptable. The most important advantages at a glance:
-
Clear central connection of all network points
-
Easily add or change new connections
-
Find and resolve faults faster
-
Neat finish in cupboard or meter cupboard
-
Less chance of cable breakage or malfunction
It has been standard for installers for years, but it is also increasingly being used in home networks.
Types of patch panels to consider
There are several types of patch panels, depending on your preference and situation:
-
LSA panel
Here you connect cables with a special tool. It is sturdy and suitable for fixed installations. -
Keystone panel
Here you click in modules. You can determine per port which type you need. Ideal for a combination of data, telephony and coax. -
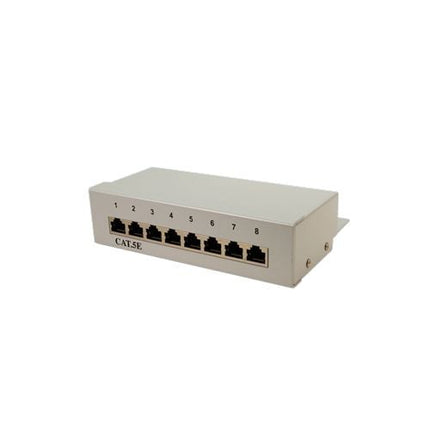
UTP or STP
UTP is unprotected and suitable for home use. STP has extra shielding against interference. This is recommended for industrial installations or in buildings with a lot of electrical equipment.
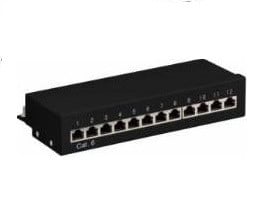
Also note the number of ports: 12 for a small installation, 24 or 48 for business applications.
Which patch panel suits your situation?
The right choice depends on where and how you place the patch panel:
-
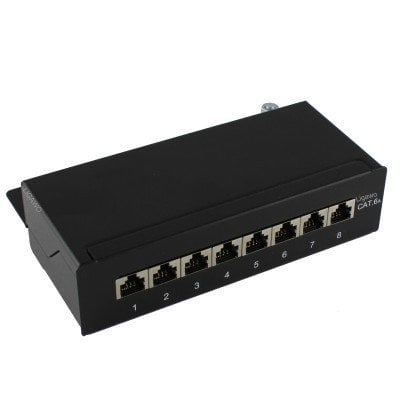
In a meter cupboard, it is best to choose a compact wall model with 6 to 12 ports
-
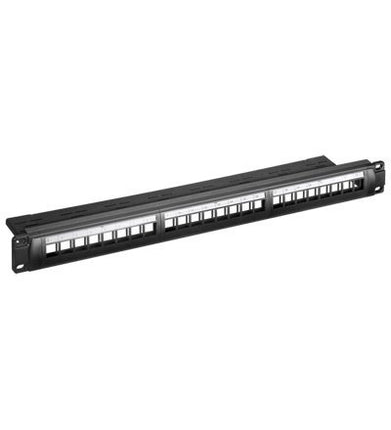
A 19 inch model with 24 or 48 ports fits in a server cabinet
-
For small offices, a wall-mounted model with cable management is useful
Also choose the right category of network cables. CAT5e is suitable for standard applications, CAT6 or higher for higher speeds and less interference. Always combine your panel with cables of the same category.
🔗 Also check out our network cables on a roll or RJ45 connectors for your complete installation.
How to install a patch panel
Installing a patch panel requires some preparation, but is easy to do yourself. Follow these steps:
-
Mount the panel in your cabinet or on the wall
-
Strip the outer sheath of your cables and sort the cores
-
Connect the wires according to the color code (T568B is standard)
-
Label each port for clarity
-
Connect the ports to your switch or router using patch cables
-
Test everything with a cable tester to rule out errors
Always use the right tools and work neatly. This will prevent kinks or damaged wires.
Common mistakes when connecting
Even though it seems simple, there are a few common mistakes you should avoid:
-
Leave no margin for cables, which causes tension
-
Using the wrong order of veins
-
Make short turns or sharp bends
-
Cables not properly shielded when using STP
-
Illegible labels or no labels used
A well-designed panel is clear and easy to manage.
Points to consider when purchasing a panel
When choosing, pay attention to these practical aspects:
-
Number of ports
Choose the right size: 12 for home, 24 or more for larger installations -
Assembly
Wall mounting or rack mounting? Check dimensions and mounting options -
Compatibility with your cable category
Use a CAT6 panel with CAT6 cables to avoid performance loss -
Cable management
Additional features such as cable guides or brackets help ensure a neat installation -
Brand and quality
Choose reliable brands such as ACT, Intellinet or Digitus. They deliver stable performance in daily use
Answers to frequently asked questions about patch panels
Is a switch required for a patch panel?
Yes, the panel connects fixed cables to a switch. Without a switch you have no network distribution.
What is the difference between LSA and keystone?
LSA is completed with a tool, Keystone works with modules that you click into place.
How do I know if everything is connected correctly?
Use a cable tester to detect errors immediately.
Is CAT5e still sufficient?
For simple home installations, yes. If you want higher speeds and better shielding, choose CAT6 or higher.
Additional information for a good choice
For additional clarity, you will find useful additions below:
-
Comparison between CAT5e, CAT6, CAT6a and CAT7
View speed, bandwidth and shielding in one overview -
Table of Wall Mount and Rack Mount Differences
Including dimensions, usage situation and port distribution -
Installation Checklist
Useful for preparation and execution -
Visual explanation of errors
With photos of common connection problems -
Schematic between modem, patch panel and switch
Simple view of your network structure
Do you want to install your network neatly and future-proof? Then a patch panel is a smart and practical choice. You can easily order via our patch panel page.